build IT Guest Book
Hundreds of people utilize build IT @SDSU Library. Next time you are in build IT, be sure to sign our guest book by taking a picture and submitting it at:http://builditguestbook.tumblr.com/submit
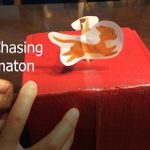
Cardboard Automaton
Cat Chasing Mouse Automaton
Learn how to make an automaton of a cat chasing a rat! This is a beginner friendly crafts project that will help you understand the basics of the mechanics behind these projects.
Supplies
- A cardboard box
- Two skewers
- Straw
- Artwork you’d like to see spin
- Scissors
- Glue
Instructions
- Get a cardboard box and use scissors to cut off the bottom and a side
- Using one of the pieces you cut off, cut a small strip of cardboard
- Using another piece you cut off, cut two circles with the same diameter
- Grab the straw and cut off a piece that is 2cm long
- On the top of the box, puncture a hole large enough to fit the straw
- On the sides of the boxes, puncture two holes that are across from one another
- At the center of the circle, puncture a hole in each
- Stick a skewer through a circle and glue them together
- Repeat step 7 for the other skewer and circle
- Stick one of the skewers through the top hole of the box and cut the remaining end of the skewer. You should have a decent length of the skewer sticking out of the top of the box
- Stick the other skewer through the sides of the box and cut off any excess wood. You should have a decent length to spin the skewer
- Make sure that the top hole’s circle is sitting on top of the other circle
- Take the piece of straw and put it through the top of the box. The straw should be stuck inside the hole of the box with the skewer inside the straw
- Grab the cardboard strip and fold the edges of the cardboard away from one another
- Glue the cat onto one end and the mouse onto the other end
- stick the top skewer through the middle of the cardboard strip
- Spin the skewer on the side to see the cat chasing the rat!
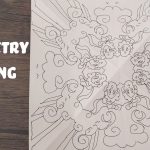
Radial Symmetry
Radial Symmetry
Make some cool art!
Supplies
- Paper
- Pencil
- Pen
- (optional) Coloring pencils, crayon, markers
Instructions
- Make your paper into a square.
- Fold the paper into a triangle into 8ths.
- Draw a pattern on one of the 8ths.
- Unfold and trace your pattern with a pen or darker marker.
- Fold the paper in half and trace your pattern on the other side of the paper. It would be helpful to have some light underneath your paper.
- Keep folding and tracing until you filled every 8th of your paper.
- Color it in if you want to!
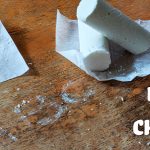
DIY Jumbo Chalk
DIY Jumbo Chalk
Relive your childhood with some jumbo sized chalk!
Supplies
For the mold:
- Toilet paper roll
- Parchment paper
- Tape
- Scissors
For the chalk:
- Cornstarch
- Water
- Dye
Instructions
- Cut toilet paper roll and tape it to the desired size of your chalk.
- Line the sides and bottom of the toilet paper roll with parchment paper and seal it with tape.
- Mix equal parts cornstarch and water together or to a thick consistency. Add drops of food coloring for color. (If using natural dyes, the natural dye is quite watery so substitute the water for the dye)
- Fill the molds with this mixture
- Let dry 12 hours or until solid
- Unwrap from the molds.
- Use to your heart’s desire! Cleans really easily with a wet paper towel.
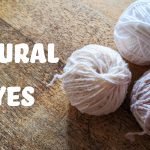
Natural Dyes
Natural Dyes
Make your own dyes out of natural materials. It's simpler than you think!
Supplies
- Dye-able material
- 4-5 Avocados
- Spinach
- Water
- Vinegar
Instructions
Preparing the fabric
- Clean your fabric
- Soak in a mordant for spinach dye. Make a vegetable based mordant by combining 1 part vinegar and 4 parts water.
- Soak in water for avocado dye.
Avocado Dye
- Get the pits and skins of 4-5 avocados. Remove as much flesh as possible
- Wash the pits and skins thoroughly and scrub off any flesh remnants
- Discard any green skins
- Simmer pits and skins with 4 cups of water for an hour or to desired color
- Strain and let cool
- Steep fabric in dye to desired color and let dry.
Spinach Dye
- Cut up a bunch of spinach into little pieces
- Simmer 1 part spinach to 2 parts water or adjust ratio for deeper color for an hour
- Strain and let cool
- Steep fabric in dye to desired color and let dry
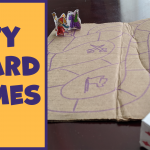
DIY Board Games
DIY Board Games
Make your own custom board games with everyday materials
Supplies
- Cardboard (Thicker cardboard is better for the board, thinner is better for game pieces and dice)
- Markers/Decorating supplies
- Scissors
- Tape
Instructions
Game Pieces
- Draw some characters (2 of each) onto thin cardboard and color them in
- Cut out your pieces, make sure the characters that go together have the same cut out shape
- On one piece of the character, cut a slit on the bottom. On the other piece of the character, cut a slit on the top. This was you can slot them together for it to stand up. This may take some trial and error to make them fit together perfectly.
Board
- Draw a snaking path on your board.
- Decorate with drawings or embellishments of your choice.
- Optionally add shortcuts or different paths.
Dice
- Look up a template for foldable cubes or even dice of even more sides
- Print or trace it out on some thin cardboard/cardstock/paper
- Cut it out
- Tape or glue it together
- Decorate your dice
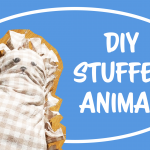
Hedgehog Stuffed Animal
DIY Stuffed Animal
An easy DIY hedghog stuffed animal. Follow along or adapt it to make it your own!
Supplies
- Scrap fabric/old T-shirt
- Scissors
- Pencil
- Old pillow/pillow stuffing
- Sharpie/ fabric marker/ buttons
Instructions
- Fold your fabric in half
- Sketch a peanut shape which will be the body of your stuffed animal
- Sketch a larger peanut shape 2 inches or larger than the smaller peanut shape
- Cut the larger shape out on both layers of fabric
- Cut slits about 1 inch apart towards the smaller peanut shape all the way around
- Then double knot the two pieces of fabric together all the way around, leaving a small hole to stuff the stuffed animal.
- After you’ve filled the stuffed animal, close up that hole by double-knotting the sides together.
- Add a friendly face with sharpies, fabric marker, or buttons.
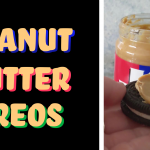
Peanut Butter Oreos
Peanut Butter Oreos
I have no clue if this was a thing before I discovered it by simply dipping oreos into peanut butter
Info
Serving Size: As many as you want, just try to not make yourself sick. They can be a bit heavy
Calories: Who cares? These are delicious and worth every
Ingredients
- A jar of Peanut Butter
- Oreos (any work but I prefer double stuffed)
Instructions
- Grab a jar of peanut butter
- Grab an Oreos
- Dip the Oreo into the peanut butter (or be a bit more sanitary, and use a knife to spread the peanut butter onto the knife)
- Enjoy!
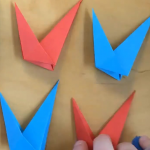
Paper Project Ideas
Video made by Elise Serrano.
Try it out yourself!
The best part of these projects is that all you need is paper!
Detailed instructions can be found here:
Origami Stars- https://www.youtube.com/watch?v=JCQf1…
Origami Wall Decoration- https://www.youtube.com/watch?v=SrCIZ…
Pinata- https://tinyurl.com/ydg5kdq3
RED and BLUE’s Stay at Home Ideas
build IT is all about promoting creativity. Just because we’re not currently open doesn’t mean that has to stop! Making your own stop motion video can be a fun way to spend your time.
This video was made by student assistants Patrick Coh and Chris Potente working from home. Patrick created the animations and edited the video. Chris created the music.
3D printed objects were found on Thingiverse and linked below:
“Eunny” “Flexible Person with Tinkercad” found on Thingiverse- https://www.thingiverse.com/thing:3879833
“alockey” “Creality Ender 3 Dog” found on Thingiverse-https://www.thingiverse.com/thing:3067755
Things you’ll need for your own stop-motion video:
- A camera with a tripod– it can be a phone camera and anything to hold it in place while you take pictures.
- Inanimate objects– it helps if the object has a degree of flexibility or if you’re able to create multiple copies of the object in different poses.
- Tape, glue, play-doh, fishing wire, pebbles– anything to help you secure the object in different poses while you take pictures
- Your imagination
Steps:
- Come up with a story. Write down story beats and create a storyboard so that you have an idea of how you’ll frame your object and set up your camera before hand. Creating a storyboard can also help you figure out where you’ll hide your securing apparatuses in each scene. They can be simple, like stick figures or blobs, but they should be detailed enough so you get an idea of how your object will move.
- Split the storyboard into different shot sequences. Note when you’ll move your camera and what’s going to happen in between each camera movement.
- Play with your inanimate object, see how it moves and figure our how you’re going to shape it and hold that shape for each frame. Do some simple camera tests to see if your poses will read to the audience.
- Set up your scene. See if you’ll need any props or if you’ll need to adjust the lighting to liven it up. Maybe take some test pictures to make sure every action in your scene can be captured.
- Make a stop motion! This part can be tedious but it will pay off. Move the object from pose to pose keeping transitions in mind. Snap a picture between each movement. We found it helps to do several “takes” by animating and snapping pictures all the way through one sequence then resetting it. Make sure you watch each take before you move on! This way, you won’t get confused by trying to perfect every shot and you’ll get to see if the sequence works all together.
- Assemble your video. Drag your images into a video-editing software. The key here is organization! Make sure to separate different takes and scenes as you’ll likely have an overwhelming number of pictures. Depending on what video-editing software you’re using you may find it easier to either create image sequences or just put your images in one by one. There are pros and cons to both. With discreet images, while you may have a ton of photos, it may be easier to delete unnecessary frames, extend the length of a frame, or duplicate frames. With image sequences, your images are contained in one clip so while you can still do all those things, it may take longer to find frames within the clip.
- Add any music or sound effects. Create your own or read up on creative commons and reusing content in our article here.
- Add any other embellishments like visual effects, create a larger interactive project, or whatever else you can think of. The sky is your limit here!