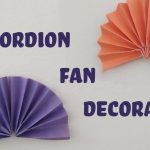
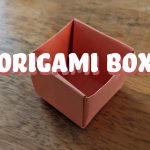
Fold the paper into 8ths (folding in half lengthways, vertically and diagonally)
Fold in all four corners to the center to make a smaller square
Fold this smaller square into thirds on both axis to create lines that separate the square into 9 tiny squares.
Open up one of the corners of the smaller square, then fold in the left and right tiny squares in the top row until it brings in one of the walls of the boxes. There will be a little triangle sticking up. Tuck that in.
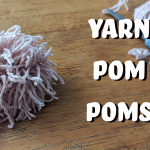
Wrap yarn around your 4 fingers 200x or depending on how full you want your pom pom to be.
Cut off the other end of the yarn and use the 2 ends to tie a knot around the center of the yarn loop. If you slide it off your hand, make sure to hold onto the shape of the yarn.
Tie the ends together tight, then trip the loops with scissors, taking care not to cut the center loop
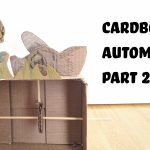
Build on your skills from the first Cardboard Automata to begin designing your own!
Supplies
Cardboard
Scissors
Wooden Dowels/Skewers
Glue
Straw
Instructions
Using inspiration from other automata, design the movement you want your automata to have.
Cut out a box with one side exposed, stick in wooden dowel for the central turn mechanism
Arrange your other cardboard pieces
Glue down non-moving cardboard pieces, mark where you’ll have moving cardboard pieces.
Consider the range of movement of the wooden dowels that will move your cardboard pieces when designing your gears.
Place feet on moving wooden dowels to better slide across gears.
Use straws to help guide wooden dowels and reduce friction.
Assemble your pieces together and test before gluing in place. This may take some trial and error. Consider changing the direction of spin, making gears more smooth and moving pieces around.
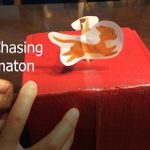
Learn how to make an automaton of a cat chasing a rat! This is a beginner friendly crafts project that will help you understand the basics of the mechanics behind these projects.
Supplies
A cardboard box
Two skewers
Straw
Artwork you’d like to see spin
Scissors
Glue
Instructions
Get a cardboard box and use scissors to cut off the bottom and a side
Using one of the pieces you cut off, cut a small strip of cardboard
Using another piece you cut off, cut two circles with the same diameter
Grab the straw and cut off a piece that is 2cm long
On the top of the box, puncture a hole large enough to fit the straw
On the sides of the boxes, puncture two holes that are across from one another
At the center of the circle, puncture a hole in each
Stick a skewer through a circle and glue them together
Repeat step 7 for the other skewer and circle
Stick one of the skewers through the top hole of the box and cut the remaining end of the skewer. You should have a decent length of the skewer sticking out of the top of the box
Stick the other skewer through the sides of the box and cut off any excess wood. You should have a decent length to spin the skewer
Make sure that the top hole’s circle is sitting on top of the other circle
Take the piece of straw and put it through the top of the box. The straw should be stuck inside the hole of the box with the skewer inside the straw
Grab the cardboard strip and fold the edges of the cardboard away from one another
Glue the cat onto one end and the mouse onto the other end
stick the top skewer through the middle of the cardboard strip
Spin the skewer on the side to see the cat chasing the rat!
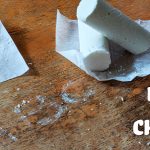
Relive your childhood with some jumbo sized chalk!
Supplies
For the mold:
Toilet paper roll
Parchment paper
Tape
Scissors
For the chalk:
Cornstarch
Water
Dye
Instructions
Cut toilet paper roll and tape it to the desired size of your chalk.
Line the sides and bottom of the toilet paper roll with parchment paper and seal it with tape.
Mix equal parts cornstarch and water together or to a thick consistency. Add drops of food coloring for color. (If using natural dyes, the natural dye is quite watery so substitute the water for the dye)
Fill the molds with this mixture
Let dry 12 hours or until solid
Unwrap from the molds.
Use to your heart’s desire! Cleans really easily with a wet paper towel.