Natural Dyes

Natural Dyes

Make your own dyes out of natural materials. It's simpler than you think!

Supplies

  • Dye-able material
  • 4-5 Avocados
  • Spinach
  • Water
  • Vinegar

Instructions

Preparing the fabric

  1. Clean your fabric
  2. Soak in a mordant for spinach dye. Make a vegetable based mordant by combining 1 part vinegar and 4 parts water.
  3. Soak in water for avocado dye.

Avocado Dye

  1. Get the pits and skins of 4-5 avocados. Remove as much flesh as possible
  2. Wash the pits and skins thoroughly and scrub off any flesh remnants
  3. Discard any green skins
  4. Simmer pits and skins with 4 cups of water for an hour or to desired color
  5. Strain and let cool
  6. Steep fabric in dye to desired color and let dry.

Spinach Dye

  1. Cut up a bunch of spinach into little pieces
  2. Simmer 1 part spinach to 2 parts water or adjust ratio for deeper color for an hour
  3. Strain and let cool
  4. Steep fabric in dye to desired color and let dry


DIY Board Games

DIY Board Games

Make your own custom board games with everyday materials

Supplies

  • Cardboard (Thicker cardboard is better for the board, thinner is better for game pieces and dice)
  • Markers/Decorating supplies
  • Scissors
  • Tape

Instructions

Game Pieces

  1. Draw some characters (2 of each) onto thin cardboard and color them in
  2. Cut out your pieces, make sure the characters that go together have the same cut out shape
  3. On one piece of the character, cut a slit on the bottom. On the other piece of the character, cut a slit on the top. This was you can slot them together for it to stand up. This may take some trial and error to make them fit together perfectly.

Board

  1. Draw a snaking path on your board.
  2. Decorate with drawings or embellishments of your choice.
  3. Optionally add shortcuts or different paths.

Dice

  1. Look up a template for foldable cubes or even dice of even more sides
  2. Print or trace it out on some thin cardboard/cardstock/paper
  3. Cut it out
  4. Tape or glue it together
  5. Decorate your dice

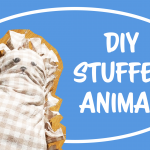
Hedgehog Stuffed Animal

DIY Stuffed Animal

An easy DIY hedghog stuffed animal. Follow along or adapt it to make it your own!

Supplies

  • Scrap fabric/old T-shirt
  • Scissors
  • Pencil
  • Old pillow/pillow stuffing
  • Sharpie/ fabric marker/ buttons

Instructions

  1. Fold your fabric in half
  2. Sketch a peanut shape which will be the body of your stuffed animal
  3. Sketch a larger peanut shape 2 inches or larger than the smaller peanut shape
  4. Cut the larger shape out on both layers of fabric
  5. Cut slits about 1 inch apart towards the smaller peanut shape all the way around
  6. Then double knot the two pieces of fabric together all the way around, leaving a small hole to stuff the stuffed animal.
  7. After you’ve filled the stuffed animal, close up that hole by double-knotting the sides together.
  8. Add a friendly face with sharpies, fabric marker, or buttons.

RED and BLUE’s Stay at Home Ideas

build IT is all about promoting creativity. Just because we’re not currently open doesn’t mean that has to stop! Making your own stop motion video can be a fun way to spend your time.

This video was made by student assistants Patrick Coh and Chris Potente working from home. Patrick created the animations and edited the video. Chris created the music.

3D printed objects were found on Thingiverse and linked below:

“Eunny” “Flexible Person with Tinkercad” found on Thingiverse- https://www.thingiverse.com/thing:3879833

“alockey” “Creality Ender 3 Dog” found on Thingiverse-https://www.thingiverse.com/thing:3067755

“HPonstein” “Sofa Business Card Holder” found on Thingiverse- https://www.thingiverse.com/thing:2414597

Things you’ll need for your own stop-motion video:

  • A camera with a tripod– it can be a phone camera and anything to hold it in place while you take pictures.
  • Inanimate objects– it helps if the object has a degree of flexibility or if you’re able to create multiple copies of the object in different poses.
  • Tape, glue, play-doh, fishing wire, pebbles– anything to help you secure the object in different poses while you take pictures
  • Your imagination

Steps:

  1. Come up with a story. Write down story beats and create a storyboard so that you have an idea of how you’ll frame your object and set up your camera before hand. Creating a storyboard can also help you figure out where you’ll hide your securing apparatuses in each scene. They can be simple, like stick figures or blobs, but they should be detailed enough so you get an idea of how your object will move.
  2. Split the storyboard into different shot sequences. Note when you’ll move your camera and what’s going to happen in between each camera movement.
  3. Play with your inanimate object, see how it moves and figure our how you’re going to shape it and hold that shape for each frame. Do some simple camera tests to see if your poses will read to the audience.
  4. Set up your scene. See if you’ll need any props or if you’ll need to adjust the lighting to liven it up. Maybe take some test pictures to make sure every action in your scene can be captured.
  5. Make a stop motion! This part can be tedious but it will pay off. Move the object from pose to pose keeping transitions in mind. Snap a picture between each movement. We found it helps to do several “takes” by animating and snapping pictures all the way through one sequence then resetting it. Make sure you watch each take before you move on! This way, you won’t get confused by trying to perfect every shot and you’ll get to see if the sequence works all together.
  6. Assemble your video. Drag your images into a video-editing software. The key here is organization! Make sure to separate different takes and scenes as you’ll likely have an overwhelming number of pictures. Depending on what video-editing software you’re using you may find it easier to either create image sequences or just put your images in one by one. There are pros and cons to both. With discreet images, while you may have a ton of photos, it may be easier to delete unnecessary frames, extend the length of a frame, or duplicate frames. With image sequences, your images are contained in one clip so while you can still do all those things, it may take longer to find frames within the clip.
  7. Add any music or sound effects. Create your own or read up on creative commons and reusing content in our article here.
  8. Add any other embellishments like visual effects, create a larger interactive project, or whatever else you can think of. The sky is your limit here!


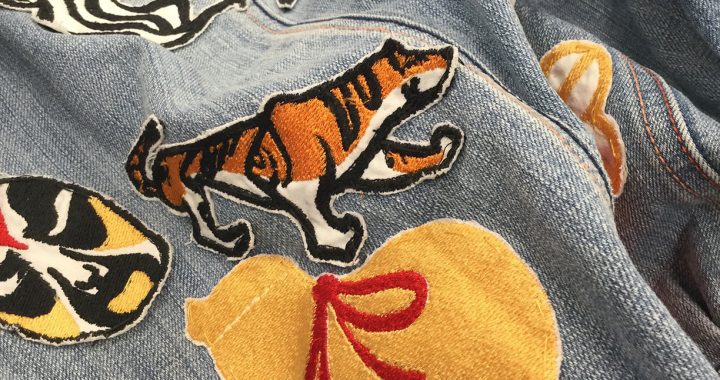
Just Keep Patching

We can’t wait to see where your creativity takes you here at build IT! This series is dedicated to showcasing just some of the cool things you can make here.

Like what you see in this video? You can do it too! Just make sure you come by for an orientation and a Brother SE600 training before you start.

Supplies:

Thrifted Jacket- ~$10
Cotton Fabric– $5.73/yard
Embroidery Backing– $8.98/100 sheets
Thread- Varies, $2-6 per spool

Tools Used:

Designs were made using Photoshop and build IT’s Wacom Intuos Tablet.
Embroidery was done with Brother SE-600 machine in build IT.
Patches were hand-sewn to the jacket with needle and thread.

Design Tips:

  • Our Brother SE-600 machines have a max area of 100x100mm. Split up larger embroiders strategically or consider other options like heat transfer vinyl or iron-on transfer paper!
  • With that max size in mind, check your design to avoid tiny lines and details. Not only will it not turn out but it could also tangle up threads.
  • If you’re trying to get your design on thicker or stiffer materials, try making patches on fabrics like cotton and sew it on by hand instead! You’ll avoid breaking needles and you’ll get better quality embroidery.
  • Got large patches of one color in your design? Try to find fabric in that color instead of sewing it. It’ll probably be cheaper and it will cut down on embroidery time.


Estimate Print Times with Cura

If you’re wondering if your print will finish within 3 hours, use Cura to help you estimate and plan! You can load your file in and check the time to help you iterate on your design before you come in.

You can download Cura for free here: https://ultimaker.com/software/ultimaker-cura.

Once downloaded, find the Anycubic i3 Mega printer under “Add a non-networked printer”

Then, open up your desired file and make sure it fits on the print bed.

Orient the print on the flattest, widest side by clicking on your part to select, then finding the rotate button in the menu on the left side of the screen.

Then, come over to the right side of your screen, where the print settings are. At build IT, we generally print either at .2mm or .3mm layer height and 10% infill density. The lower the layer height, the longer it will take. If you have overhangs in your file, also check the add support box.

Yours may not look like this, we reduced the number of visible settings for clarity.

After you’re done adjusting, look down under the settings to see the slice button. Simply, click it to see how long your print will take!