Skip to content
Inanimate props
Moldable props like clay or dough
Adhesives to help keep props together like tape or fishing wire
Plan out your scene with props and movement
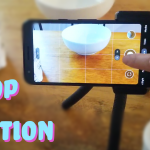
Prop up a stationary camera that won’t move around.
Use grids on camera to help guide movement
Come up with movement for your props and incrementally move and take pictures.
Come up with “cheats” or cuts to skip harder movement.
Yarn
Crochet Hook
Yarn Needle
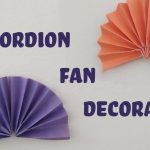
Accordion fold a piece of paper on the short side into half inch pleats
Cut the piece of paper in half on the short side so you can tape together the pleats into one long strip.
Make sure the pleats line up, trim if necessary
Tape together pairs on one side of the pleats to gather the pleats into a fan shape.
Repeat, taping together taped pairs to hold the shape.
If the paper is curling towards one side, flip the fan over and tape together pairs of pleats on the other side to balance out the fan.
Optionally, tape the bottom together to hold the fan more open or closed.
Make a square piece of paper
Fold the paper into 8ths (folding in half lengthways, vertically and diagonally)
Fold in all four corners to the center to make a smaller square
Fold this smaller square into thirds on both axis to create lines that separate the square into 9 tiny squares.
Open up one of the corners of the smaller square, then fold in the left and right tiny squares in the top row until it brings in one of the walls of the boxes. There will be a little triangle sticking up. Tuck that in.
Repeat on the other side.
paper (colored construction paper was used in the video)
scissors
pencil/pen
tape and/or glue
Choose paper and fold in half
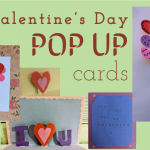
Mark out slits to cut out (for the “pop” part)
Cut and crease the pop-out sections
Measure, trace, and cut out the symbols or letters you want
Attach them to the pop outs
Adhere the inner paper to the outer cover
Crease where necessary and make sure it opens and closes well, without being folded incorrectly
Decorate the outside cover of your card
Write a message inside and send it off!
Soak candles in hot but not boiling water for 10 minutes or until pliable
Slowly mold candles, adding more hot water as needed to keep candles soft.
Make sure the candle can be balanced on a surface.
Board (corkboard/paperboard/cardboard)
Adhesives (tape, push pins, putt)
Decoration (magazine cutouts, stickers, drawings, ornaments, written goals)
Create a collage to inspire you through 2021!
Yarn or string
Scissors
Tape
Keychain
Cut three two-feet strings
Fold each one in half
To create a knot insert the close end of the string into the keychain
Loop the two loose ends through the hole made by the other end
Repeat steps 3 and 4 for the other two
Tape down the keychain
Going from left to right, grab the third string and throw it over the second string
Grab the end of the second string and loop it into the hole created by the third string
Repeat the loop for the second string
Toss the third string over the first string
Repeat steps 8 and 9 for the third string
Grab the fourth string and toss it over the fifth string
loop the fifth string into the hole made by the fourth string
Repeat the loop for the fifth string
Toss the fourth string over the sixth string
Repeat steps 13 and 14 for the sixth string
Grab the third and fourth string
Toss the third string over the fourth string
Loop the end of the bottom string through the hole
Repeat steps 18 and 19
Repeat steps 7-21 until satisfied
Separate the ends into three groups
to create a knot, grab the ends of one group and create a hole
Loop the two ends through the hole
Repeat steps 23 and 24
Hold on to one end of yarn between your fingers
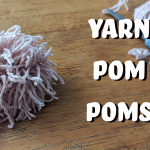
Wrap yarn around your 4 fingers 200x or depending on how full you want your pom pom to be.
Cut off the other end of the yarn and use the 2 ends to tie a knot around the center of the yarn loop. If you slide it off your hand, make sure to hold onto the shape of the yarn.
Tie the ends together tight, then trip the loops with scissors, taking care not to cut the center loop
Trim into sphere shape.
A square piece of paper
Markers/Pencils for decoartion (optional)
Follow along with the video
Pause the video when needed and rewind to rewatch steps
Don’t worry if your swan doesn’t turn out the first time, they take practice!
Post navigation


