Just Keep Patching

We can’t wait to see where your creativity takes you here at build IT! This series is dedicated to showcasing just some of the cool things you can make here.

Like what you see in this video? You can do it too! Just make sure you come by for an orientation and a Brother SE600 training before you start.

Supplies:

Thrifted Jacket- ~$10
Cotton Fabric– $5.73/yard
Embroidery Backing– $8.98/100 sheets
Thread- Varies, $2-6 per spool

Tools Used:

Designs were made using Photoshop and build IT’s Wacom Intuos Tablet.
Embroidery was done with Brother SE-600 machine in build IT.
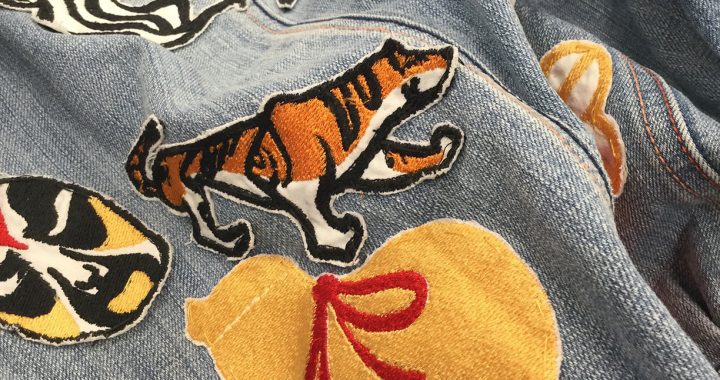
Patches were hand-sewn to the jacket with needle and thread.

Design Tips:

  • Our Brother SE-600 machines have a max area of 100x100mm. Split up larger embroiders strategically or consider other options like heat transfer vinyl or iron-on transfer paper!
  • With that max size in mind, check your design to avoid tiny lines and details. Not only will it not turn out but it could also tangle up threads.
  • If you’re trying to get your design on thicker or stiffer materials, try making patches on fabrics like cotton and sew it on by hand instead! You’ll avoid breaking needles and you’ll get better quality embroidery.
  • Got large patches of one color in your design? Try to find fabric in that color instead of sewing it. It’ll probably be cheaper and it will cut down on embroidery time.

 

Estimate Print Times with Cura

If you’re wondering if your print will finish within 3 hours, use Cura to help you estimate and plan! You can load your file in and check the time to help you iterate on your design before you come in.

You can download Cura for free here: https://ultimaker.com/software/ultimaker-cura.

Once downloaded, find the Anycubic i3 Mega printer under “Add a non-networked printer”

Then, open up your desired file and make sure it fits on the print bed.

Orient the print on the flattest, widest side by clicking on your part to select, then finding the rotate button in the menu on the left side of the screen.

Then, come over to the right side of your screen, where the print settings are. At build IT, we generally print either at .2mm or .3mm layer height and 10% infill density. The lower the layer height, the longer it will take. If you have overhangs in your file, also check the add support box.

Yours may not look like this, we reduced the number of visible settings for clarity.

After you’re done adjusting, look down under the settings to see the slice button. Simply, click it to see how long your print will take!

orientation-image

build IT Orientation

A RedID is required to attend this orientation workshop.

This orientation is required for anyone wanting to access build IT. It will provide a general introduction to the space, best practices and for its use, and importantly, an introduction to potential hazards, protective equipment, and other aspects of safe Makerspace use.

After this orientation, attendees will be given card access to use build IT during open hours.

Be sure to RSVP here

orientation-image

build IT orientation

A RedID is required to attend this orientation workshop.

This orientation is required for anyone wanting to access build IT. It will provide a general introduction to the space, best practices and for its use, and importantly, an introduction to potential hazards, protective equipment, and other aspects of safe Makerspace use.

After this orientation, attendees will be given card access to use build IT during open hours.

Be sure to RSVP here